")


Membrane Style Keypads: they’re thin and they also have adhesive backing so you can stick them to most flat surfaces.
How Keypads Work
The buttons on a keypad are arranged in rows and columns.
- A 3X4 keypad has 4 rows and 3 columns.
- A 4X4 keypad has 4 rows and 4 columns:

Beneath each key is a membrane switch. Each switch in a row is connected to the other switches in the row by a conductive trace underneath the pad. Each switch in a column is connected the same way – one side of the switch is connected to all of the other switches in that column by a conductive trace. Each row and column is brought out to a single pin, for a total of 8 pins on a 4X4 keypad.
explain the sketch
Lines 3 and 4 in the code above set the number of rows and columns on the keypad.
Lines 6-11 define which characters are printed when a particular button is pressed on the keypad. The characters are laid out just as they appear on the keypad. If your keypad has a different layout, you can define which characters are printed when you press a button. For example, say your keypad has a column of letters on the left instead of the right. You would just change it to this:
char hexaKeys[ROWS][COLS] = {
{‘A’, ‘1’, ‘2’, ‘3’},
{‘B’, ‘4’, ‘5’, ‘6’},
{‘C’, ‘7’, ‘8’, ‘9’},
{‘D’, ‘*’, ‘0’, ‘#’}
};
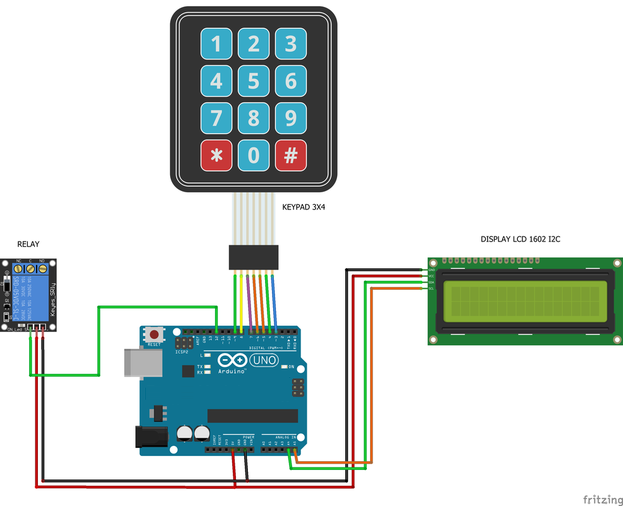
Application idea
End of post!